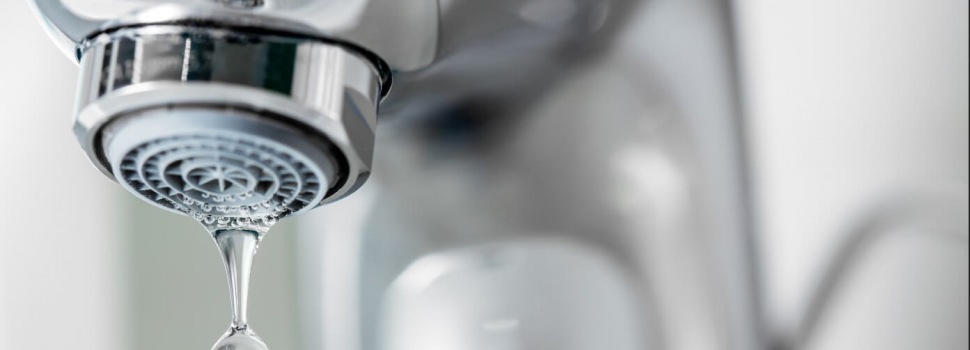
Everyone experiences a leaking tap at some point in their life. It’s one of those very annoying plumbing problems that many tend to put off fixing until it’s too late. If leaking taps are left for too long, it has the potential to cause some serious damage to both your house and your wallet.
Repairing mixer tap leaks and dripping taps is actually a very simple DIY job that anyone can perform regardless of experience level, and the sooner you get onto it, the less water and money you’ll lose down the drain thanks to things such as poor water pressure.
Need An Urgent Fix? Call Us Now!
What is a Mixer Tap?
Mixer taps are the most common style of tapware found in Australian homes today. Traditionally, bathrooms, kitchens and laundries featured a 3-piece tap set which consisted of separate hot and cold water taps and a tap spout. Mixer taps have a more streamlined and modern design, allowing users to control the flow and ‘mix’ the temperature of their water with a single handle.
What is a Ceramic Cartridge?
Traditional 3-piece tapware often features an internal rubber seal, or tap washer. Over time, this washer would perish and cause leakages. Instead of a rubber washer, most modern tapware is constructed with a highly durable ceramic cartridge.
A ceramic cartridge consists of a pair of discs that sit atop one another. The bottom disc remains fixed while the upper disc rotates when the handle is operated. When the handle is turned on, the upper disc moves, permitting either cold or hot water to flow through the mixer. When the handle is returned to its ‘off’ position, the ceramic disc blocks the water flow.
Whilst ceramic discs are far more advanced and durable than washers, they can still be prone to cracks and scratches which can cause leakages.
Checklist
In order to fix your leaking mixer tap, you will need:
- Replacement cartridge (if you are unsure as to what cartridge you need, consult your tap manufacturer)
- Allen key
- Small, flat-blade screwdriver
- Stanley knife
- Adjustable spanner
- Pipe wrench
Please note: Any plumbing tasks that are beyond replacing cartridges should be left to the professionals. Before carrying out any other plumbing work, check with your state’s plumbing regulations. Performing unlicensed plumbing work is illegal and you will not be covered by insurance.

How to Fix a Leaking Mixer Tap
1. Turn Off Your Water Supply
The first step to repairing a leaking or dripping tap is to ensure that the water supply to your mixer tap has been turned off. You can turn off the water supply at either a stop valve or an isolation valve. The stop valve can be found next to your water meter and the isolation valve on the supply pipes below your sink.
Turn on your mixer to release any remaining water left in your pipes, then put a plug in your basin or sink to prevent any parts from falling down the drain as you work.
2. Remove Plastic Cap/Cover
Your first real challenge when fixing a mixer tap leak is locating and removing the cap that conceals the grub screw. On most taps, this cap is the hot/cold indicator button found on your mixer handle.
You can sometimes lift the cap off by using your nails, but if you are struggling, you can use a Stanley knife to carefully lift the button and a small, flat-head screwdriver to finish prying it out. If you’re not careful you may damage the cap, but replacements can be found easily at most plumbing and hardware stores.
3. Remove the Grub Screw & Handle
After you’ve successfully removed the cap from your mixer handle, you’ll find a grub screw located in the hole underneath. This screw is what fixes your handle to the base of your mixer tap. Use your Allen key to undo the grub screw until you can lift the handle off the cartridge spindle. The grub screw sizes vary from tap to tap, but a 2mm or 2.5mm Allen key generally does the job.
Sometimes a build-up of calcium carbonate, commonly known as limescale, can cause the mixer handle to stick to the base. If you are finding that the limescale is preventing you from removing your mixer handle, soak your mixer in a half-water, half-vinegar combination. After about 20 minutes of soaking, you should be able to remove your mixer handle.
4. Remove Chrome Dress Ring & Retaining Nut
The next step is to remove the chrome dress ring. There are no flat sides on this ring so you will need to use a pipe wrench. After removing the dress ring, you will discover a brass retaining nut. Use your spanner to unscrew and remove to find your mixer’s ceramic cartridge. If you are worried about damaging your tap’s finish, use an old rag in between your tools and the mixer.
5. Replace the Cartridge
Once you have gained complete access to the cartridge, gently remove and replace it with a new one of the exact same model. Ensure that you follow any instructions provided by the manufacturer and that the cartridge’s locator pins match up.
6. Reassemble the Mixer & Turn On Water Supply
Once the new cartridge has been fitted, reassemble your tap and then reactivate your water supply at either your stop or isolation valve. We recommend that you keep towels in place in case there are any leakages. If you have tested your mixer and are satisfied with the result you are done!
Contact Tunnel Vision - Perth's Plumbing Specialists
To fix a leaking or dripping mixer tap, all you need is time and dedication. You can use the information in this article to help you, but we understand that not everyone has the time to do so.
If you need help fixing just one or several leaking water taps, consult a plumbing expert such as Tunnel Vision. Our team of highly experienced plumbers have the experience and skills required to fix any plumbing problem, fast. For all enquiries, contact Tunnel Vision on 1800 631 799 or book online!