A dripping tap can be a major source of annoyance in your home or business. Over time, a leaking tap can cost you money due to water wastage and can even lead to damage within your property.
Learning how to change a tap washer is a simpler job than you may think, and it can save you money in the long run. Find out how you can change a tap washer in 8 simple steps!
Need An Urgent Fix? Call Us Now!
What is a Tap Washer?
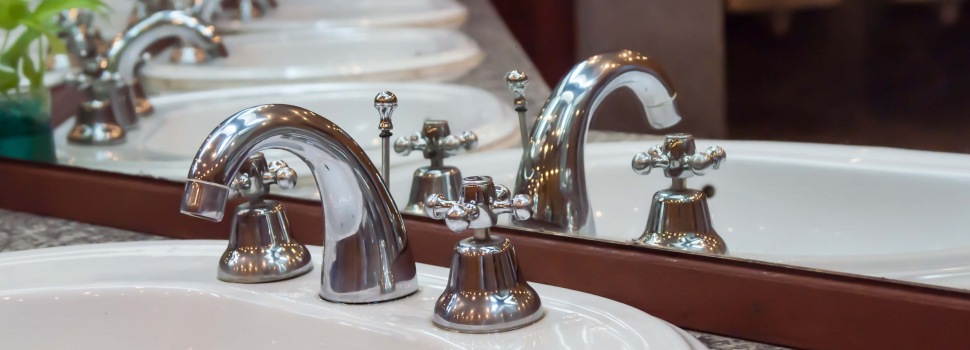
A tap washer is a small rubber disc that sits inside the tap, close to the seat of the tap. When the tap is turned off, the washer pushes against the seat to create a watertight seal, preventing any water from escaping.
It is worth noting, however, that more modern tapware tends to have ceramic cartridges instead of rubber washers. It is important to find out which type of tapware you have before attempting any DIY work.
Why Would You Need to Change a Tap Washer?
Over time, a tap washer endures substantial wear and tear, so its quality will deteriorate. This often means it can no longer form a seal that is solid enough to contain the water when the tap is turned off. Therefore, the tap will start to drip.
If you have a tap that is dripping or your tap shows signs of damage or limescale, you will likely need to change the tap washer. This will usually fix the problem of a dripping tap. If this doesn’t solve the issue, it's time to call in a professional plumbing company.
Checklist
Before you start changing tap washers, you need to check that you have all the right tools and materials in your toolbox. You will need:
- Replacement washers, available from any hardware store
- Spanners
- Flathead screwdriver
- Phillips screwdriver
- Pliers
- Tweezers or needle-nose pliers
- Rags for mopping up
Please note: Any plumbing tasks that are beyond replacing a tap washer should be left to the professionals. Before carrying out any other plumbing work, check with your state’s plumbing regulations. Performing unlicensed plumbing work is illegal and you will not be covered by insurance.
Once you have all the necessary tools and materials, you’re ready to change the tap washer.
How to Change a Tap Washer
A tap washer can be changed in 8 easy steps:
1. Turn Off Your Water Supply
Before changing the tap washer, ensure that the water supply to the tap is turned off. You can turn off the water supply at either of two places:
- Stop valve, which is located next to your water meter
- Isolation valve, which you can find on the pipes underneath the affected basin or bath
Once this is done, turn on the tap to release any excess water in the pipes. Following this, it is a good idea to put the plug in the basin or bath to prevent any debris from getting into the drain while you are working.
2. Remove the Tap Button
The tap button can usually be found on the top of the tap. It often indicates whether the tap gives hot or cold water. This tap button needs to be removed so you can access the inner workings of the tap. You can easily pop the tap button off using a flathead screwdriver.
Slide the screwdriver under the tap button and see if you can find an indentation, which most tap buttons have. You can then use this indentation to lever the button off the top of the tap with the screwdriver.
3. Remove the Handle
Underneath the tap button, you’ll find a screw. Depending on what type of screwhead it has, use either your flathead or Phillips screwdriver to turn the screw counter-clockwise until it comes out. Once you have removed the screw, you can lift up the tap handle and remove that, too.
4. Remove the Tap Skirt
You may also see a skirt on the tap made of metal. You need to remove this using pliers as it might have been secured with a sealant.
5. Remove the Tap Bonnet
The tap bonnet is the actual body of the tap. You now need to remove this using a spanner. This will enable you to see the jumper valve inside the tap, which is made of brass or plastic. Remove this, too, and you will able to access the washer.
6. Remove the Tap Washer
The tap washer can be difficult to access, and it might be held in place by a small nut or screw. Remove this with a screwdriver, then use a pair of tweezers or needle-nose pliers to get hold of the tap washer and pull it out.
7. Replace the Tap Washer
Tap washers come in different shapes and sizes, so it is important that the new washer you use is an exact match for the old one. If in doubt, take the worn tap washer to your hardware store and let the experts there find the right replacement washer for you.
Using your fingers, tweezers or needle-nose pliers, slide the new washer into place on the tap stem. Then replace the small screw that held the old washer in place.
You can also take this opportunity to clean any limescale from the inside of the tap. This makes sure it will be in better working order when you put it back together.
8. Reassemble Tap and Turn the Water Supply Back On
To reassemble the tap, you need to reverse the steps you used to take it apart, making sure each piece is going back in the right place and the right order. Take care to tighten all screws until they are snug.
Once the tap is reassembled, turn the water supply back on and your tap is ready to use!
Contact the Plumbing Experts
Learning how to change a tap washer is a highly useful DIY skill that will put a stop to annoying dripping taps in your home and potentially save you money.
However, should the job prove too difficult, or if changing your tap washers does not solve the problem, it’s time to enlist the services of a professional plumbing company such as Tunnel Vision. If you would like more advice and support, please reach out – we are always happy to help! Contact us today on 1800 631 799 or book online!